Opening the Module Creator and Filling In Basic Information
Opening the module creator
Method 1 — From inside Workspace (while designing a project):
- Open a project in Workspace.
- On the main navigation rail on the left, click the "My Library" button.
- The "My Modules" panel opens, listing the modules you've created yourself.
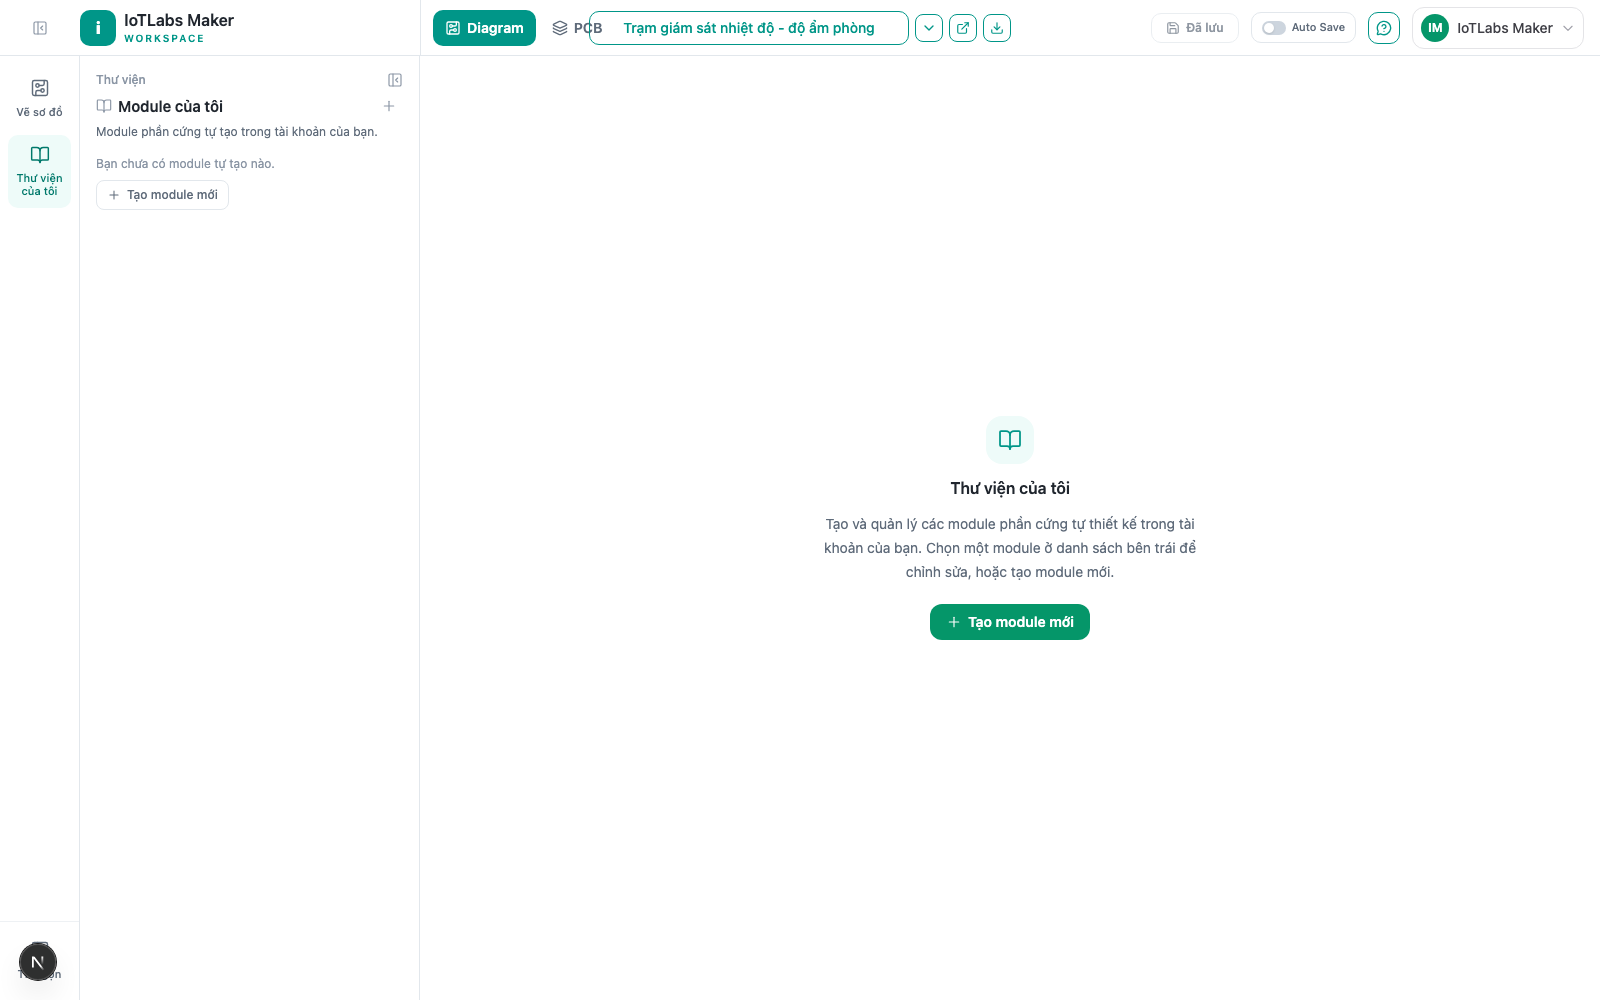
- Click the + button in the top-right corner of the panel header (tooltip "Create New Module"). If there are no modules yet, you can also click the "+ Create New Module" button in the middle of the empty panel.
Method 2 — From the dedicated management page (no need to open a project):
- Go to /member/hardware-modules.
- Click the "+ Create Module" button in the top-right corner.
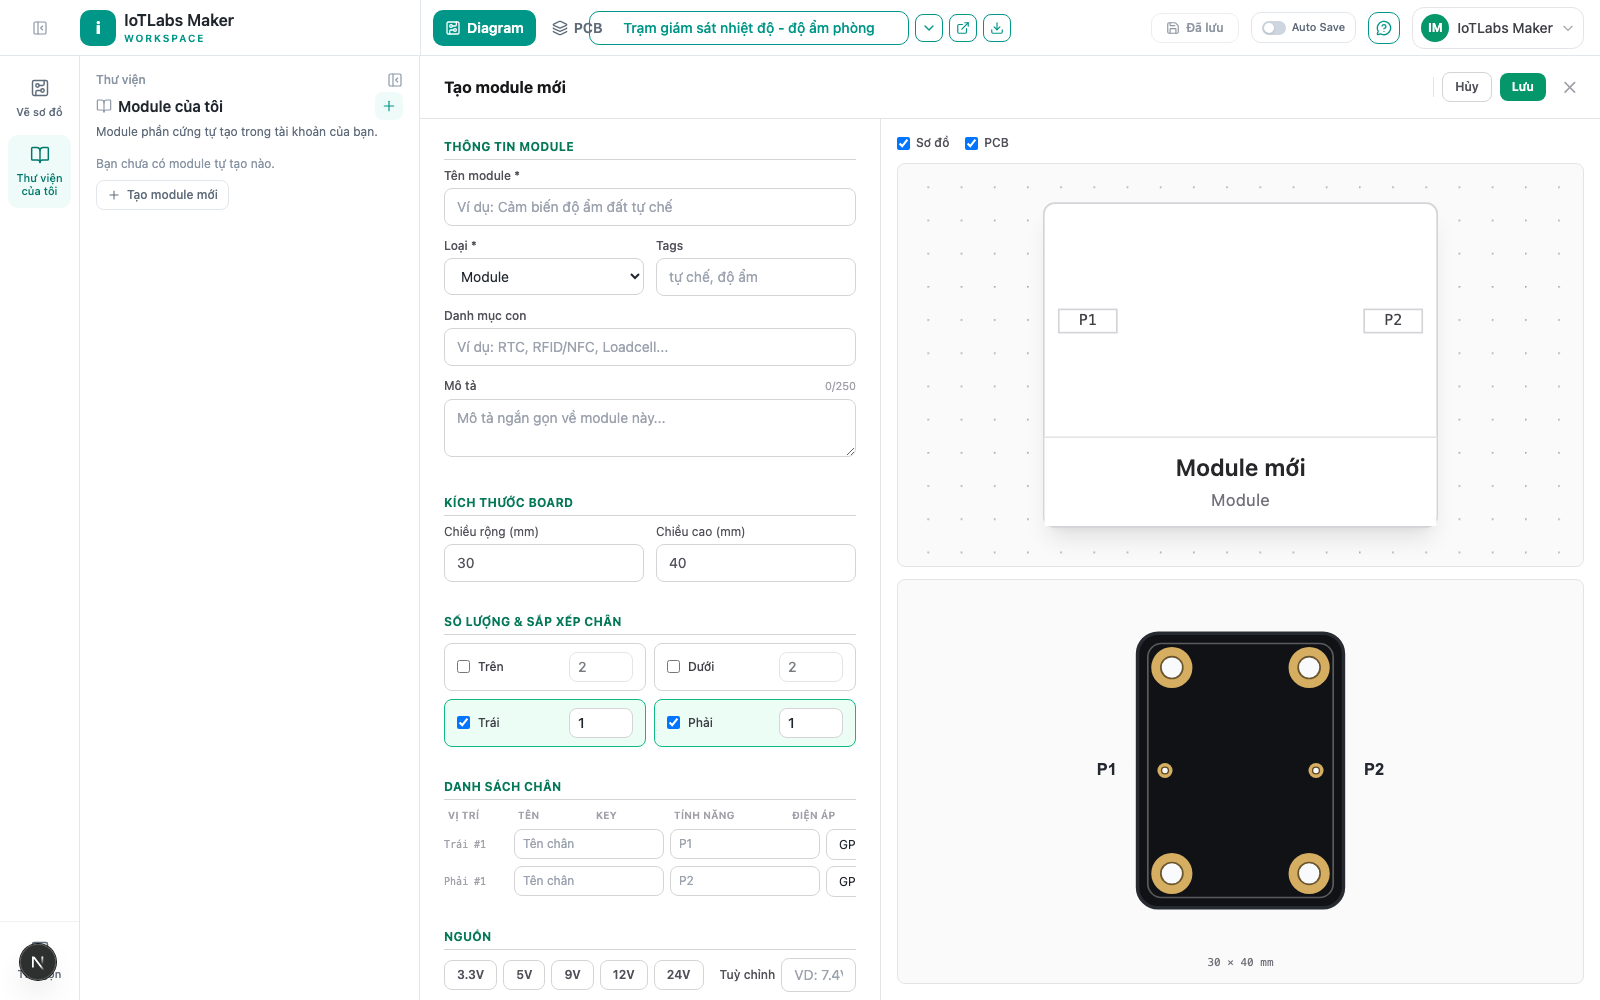
Result: the Hardware Module Designer opens in create mode, with the title showing "Create New Module". This is the same editor whether you open it from Workspace (shown as an overlay/center panel) or from the dedicated page (shown full-page) — every field and behavior is identical.
Filling in module information
Under "Module Information":
- Enter *"Module Name " (required) — e.g. "Custom Soil Moisture Sensor".
- Choose "Type *": Board / Module / Sensor.
- (Optional) Enter "Tags", comma-separated — e.g. "custom, moisture".
- (Optional) Enter "Subcategory" — e.g. "RTC", "RFID/NFC", "Load Cell".
- (Optional) Enter "Description" — up to 250 characters, with a character counter shown right next to the label.
Result: this information is displayed on the module's card in the library and helps you/others identify the module more quickly.
Board size
Under "Board Size", enter "Width (mm)" and "Height (mm)" (each value between 10–300 mm). This size is used to draw the board shape in the preview panel and when the module appears on the PCB.
Example
Creating the "DS3231 RTC – Real-Time Clock (I2C)" module: choose Type Module, enter Tags "RTC, I2C, DS3231, real-time clock", and Subcategory "Real-Time Clock (RTC)" — the module card in the library will show the correct name and can be filtered/searched with these tags later.