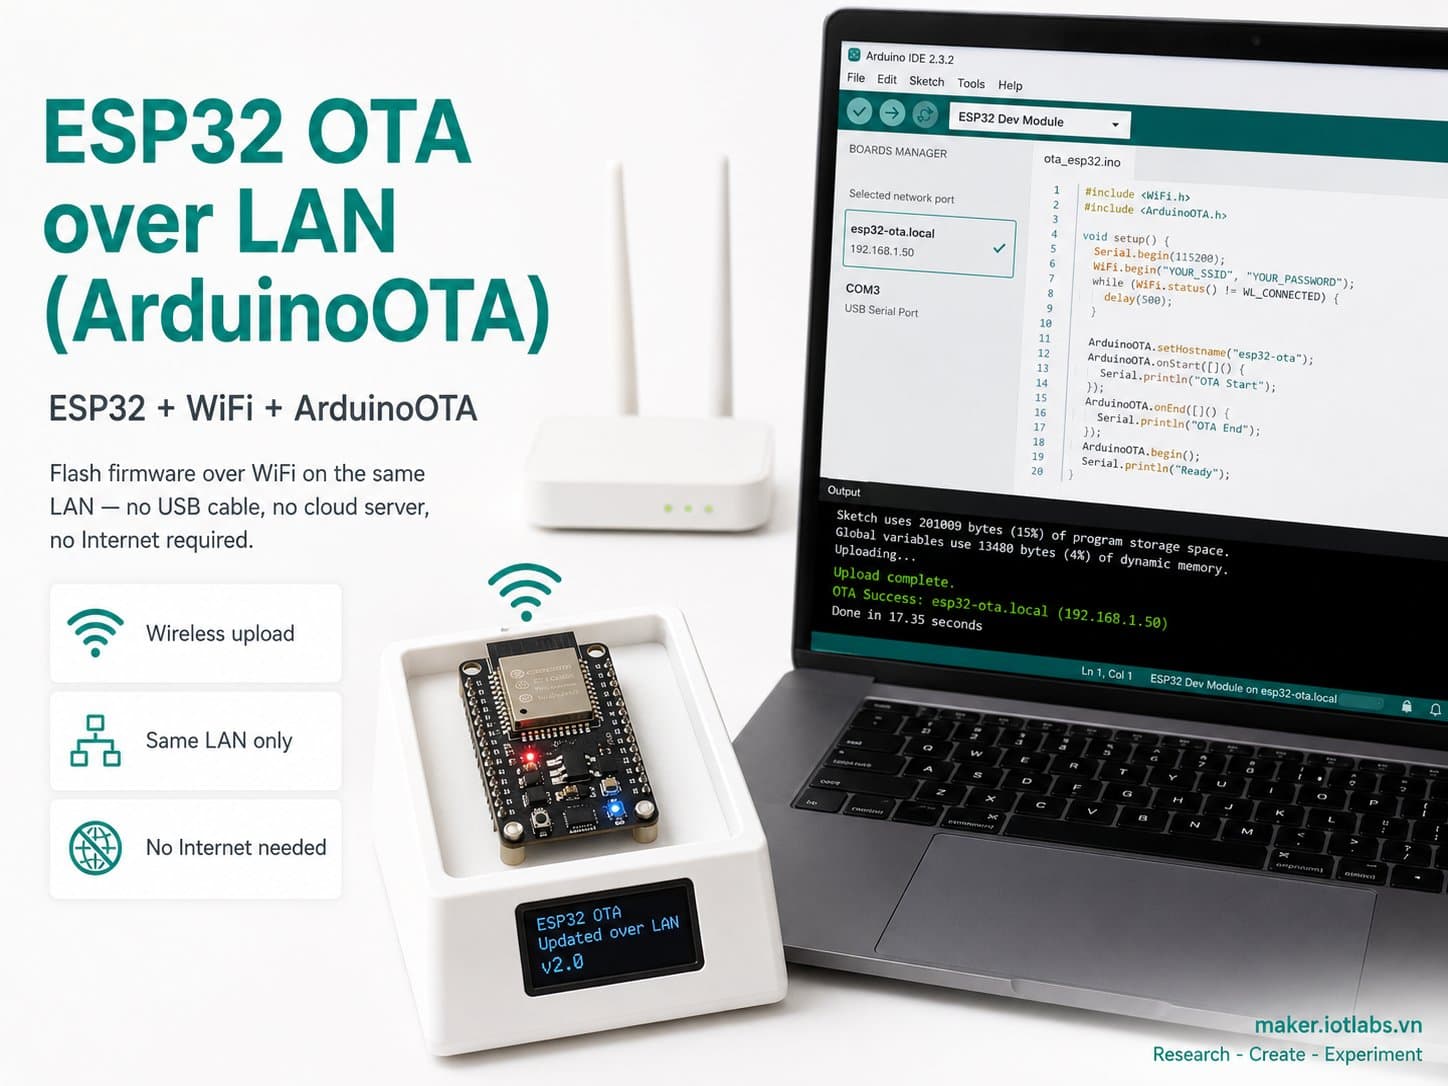
ESP32 OTA over LAN (ArduinoOTA)
Flash ESP32 firmware over WiFi on the same LAN using the built-in ArduinoOTA library — no USB cable, no cloud server, no Internet required.
OTA (Over-The-Air) is a wireless firmware-flashing technique, especially handy once an ESP32 is permanently installed and its USB port is hard to reach.
This guide uses the built-in ArduinoOTA library from the ESP32 Arduino core to flash code over the local LAN: your computer and the ESP32 join the same WiFi network, and the Arduino IDE/PlatformIO auto-discover the ESP32 as a "Network Port" via mDNS and flash it directly — no separate OTA server, no Internet needed.
This is an important distinction from the "ESP32 Cloud OTA" project already published on IoTLabs' Vietnamese site (that one flashes firmware through an Internet-hosted server, for devices that are remote and not on the same LAN as the developer). This lesson also stresses setting an OTA password and restricting use to a trusted network during development/demos.
Detailed guide
Flash ESP32 firmware over WiFi on the same LAN using ArduinoOTA, how it differs from Cloud OTA, with arduino-cli compile-verified code and a PlatformIO espota config.
1. Introduction
OTA (Over-The-Air) is a wireless firmware-flashing technique, especially handy once an ESP32 is permanently installed inside an enclosure or its USB port is hard to reach. This guide uses the ArduinoOTA library built into the ESP32 Arduino core (no extra install needed) to flash firmware over the local LAN: your computer and the ESP32 join the same WiFi network, and the Arduino IDE/PlatformIO auto-discover the ESP32 as a "Network Port" via mDNS, flashing it directly over the espota protocol — no separate OTA server, no Internet needed.
An important distinction from the "ESP32 Cloud OTA" project already on maker.iotlabs.vn: that project flashes firmware through an Internet-hosted server (the device pulls the update from a remote URL), which suits devices already deployed out in the field, not on the same LAN as the developer. This guide is the opposite — it only works when the PC and ESP32 are on the same LAN/WiFi network, suited to local development/debugging with no server infrastructure needed.
Safety note: ArduinoOTA has no strong authentication by default — this guide always sets ArduinoOTA.setPassword(), and it should only be used on a trusted LAN for development/demos, never for a commercial product exposed to untrusted networks.
2. Components Needed
Component | Qty | Notes |
|---|---|---|
ESP32 DevKit V4 (board_esp32_devkitc) | 1 | The only board you need — WiFi is already built in, no external module required |
3. Wiring Diagram
This is a board-only demo: no external modules, no wiring needed. The ESP32 DevKit just needs power (USB for the first flash) and a WiFi connection — every OTA flash after that is completely wireless.
4. Example #1 — Full ArduinoOTA Setup with WiFi Retry and Heartbeat
Connects to WiFi with a timeout and periodic auto-retry (no infinite while loop blocking the program), sets up the full set of OTA callbacks (onStart/onEnd/onProgress/onError), and logs a heartbeat every 5 seconds so you know the device is still alive while waiting for OTA.
/*
  ESP32 OTA qua mang LAN (ArduinoOTA)
  Board: ESP32 DevKit V4 (esp32:esp32:esp32)

  Demo nap firmware qua WiFi trong CUNG mang LAN, dung thu vien
  ArduinoOTA (co san trong ESP32 Arduino core - khong can cai them).
  Khac voi "ESP32 Cloud OTA" (nap qua Internet/may chu cloud):
  o day PC va ESP32 phai CUNG mot mang WiFi noi bo, Arduino IDE/
  PlatformIO se thay ESP32 nhu mot "Network Port" va nap truc tiep,
  khong can may chu OTA rieng, khong can Internet.

  LUU Y AN TOAN: ArduinoOTA mac dinh khong yeu cau xac thuc manh -
  nen dat ArduinoOTA.setPassword() (da lam ben duoi) va chi dung
  trong mang LAN tin cay khi phat trien/demo, khong dung cho san
  pham thuong mai public.
*/

#include <Arduino.h>
#include <WiFi.h>
#include <ESPmDNS.h>
#include <ArduinoOTA.h>

// TODO: thay bang thong tin WiFi that cua ban truoc khi nap.
const char* WIFI_SSID     = "YOUR_WIFI_SSID";
const char* WIFI_PASSWORD = "YOUR_WIFI_PASSWORD";

const char* OTA_HOSTNAME  = "esp32-lan-ota-demo";
const char* OTA_PASSWORD  = "iotlabs-ota-2026"; // doi mat khau nay khi dung that

const uint32_t WIFI_CONNECT_TIMEOUT_MS = 15000;
const uint32_t WIFI_RETRY_INTERVAL_MS  = 10000;

unsigned long lastWifiRetryAt = 0;

bool connectWiFi() {
  Serial.printf("Dang ket noi WiFi SSID \"%s\"...\n", WIFI_SSID);
  WiFi.mode(WIFI_STA);
  WiFi.begin(WIFI_SSID, WIFI_PASSWORD);

  unsigned long start = millis();
  while (WiFi.status() != WL_CONNECTED && millis() - start < WIFI_CONNECT_TIMEOUT_MS) {
    delay(300);
    Serial.print(".");
  }
  Serial.println();

  if (WiFi.status() == WL_CONNECTED) {
    Serial.printf("WiFi da ket noi. IP: %s\n", WiFi.localIP().toString().c_str());
    return true;
  }

  Serial.println("[WARN] Ket noi WiFi that bai (timeout) - se thu lai dinh ky trong loop().");
  return false;
}

void setupOTA() {
  ArduinoOTA.setHostname(OTA_HOSTNAME);
  ArduinoOTA.setPassword(OTA_PASSWORD);

  ArduinoOTA
    .onStart([]() {
      String type = (ArduinoOTA.getCommand() == U_FLASH) ? "sketch" : "filesystem";
      Serial.println("[OTA] Bat dau cap nhat: " + type);
    })
    .onEnd([]() {
      Serial.println("\n[OTA] Cap nhat hoan tat, chuan bi reboot...");
    })
    .onProgress([](unsigned int progress, unsigned int total) {
      Serial.printf("[OTA] Tien do: %u%%\r", (progress / (total / 100)));
    })
    .onError([](ota_error_t error) {
      Serial.printf("[OTA] Loi [%u]: ", error);
      if (error == OTA_AUTH_ERROR) Serial.println("Auth Failed");
      else if (error == OTA_BEGIN_ERROR) Serial.println("Begin Failed");
      else if (error == OTA_CONNECT_ERROR) Serial.println("Connect Failed");
      else if (error == OTA_RECEIVE_ERROR) Serial.println("Receive Failed");
      else if (error == OTA_END_ERROR) Serial.println("End Failed");
    });

  ArduinoOTA.begin();
  Serial.printf("[OTA] San sang. Hostname: %s.local (mDNS)\n", OTA_HOSTNAME);
}

void setup() {
  Serial.begin(115200);
  delay(200);
  Serial.println();
  Serial.println("=== ESP32 LAN OTA (ArduinoOTA) Demo boot ===");

  if (connectWiFi()) {
    setupOTA();
  }
}

void loop() {
  if (WiFi.status() == WL_CONNECTED) {
    // ArduinoOTA.handle() phai duoc goi lien tuc, khong dung delay() dai
    // trong loop() de khong bo lo yeu cau OTA tu may tinh.
    ArduinoOTA.handle();
  } else {
    // Mat WiFi -> thu ket noi lai dinh ky, KHONG while() vo han chan chuong trinh.
    unsigned long now = millis();
    if (now - lastWifiRetryAt >= WIFI_RETRY_INTERVAL_MS) {
      lastWifiRetryAt = now;
      Serial.println("[WiFi] Mat ket noi, thu ket noi lai...");
      if (connectWiFi()) {
        setupOTA();
      }
    }
  }

  // Telemetry chu ky de biet thiet bi van song trong luc cho OTA.
  static unsigned long lastHeartbeatAt = 0;
  if (millis() - lastHeartbeatAt >= 5000) {
    lastHeartbeatAt = millis();
    Serial.printf("[HEARTBEAT] uptime=%lus wifi=%s ip=%s\n",
      millis() / 1000,
      WiFi.status() == WL_CONNECTED ? "connected" : "disconnected",
      WiFi.status() == WL_CONNECTED ? WiFi.localIP().toString().c_str() : "-");
  }
}
5. Example #2 — A Minimal ArduinoOTA Setup
A stripped-down version keeping only what's required to enable OTA over LAN — handy once you're comfortable with the WiFi.begin() flow and just need the quick "recipe" for enabling ArduinoOTA in a demo.
/*
  ESP32 LAN OTA - Vi du 2: Cau hinh ArduinoOTA toi gian
  Board: ESP32 DevKit V4

  Ban rut gon cua vi du 1 - chi giu lai phan bat buoc de bat OTA
  qua LAN, phu hop khi ban da quen WiFi.begin() va chi can nho
  "cong thuc" ArduinoOTA. Dung cho du an demo nhanh, khong co
  retry/heartbeat nhu vi du 1 (khuyen nghi dung ban day du trong
  du an thuc te).
*/

#include <Arduino.h>
#include <WiFi.h>
#include <ArduinoOTA.h>

const char* WIFI_SSID     = "YOUR_WIFI_SSID";
const char* WIFI_PASSWORD = "YOUR_WIFI_PASSWORD";

void setup() {
  Serial.begin(115200);
  WiFi.mode(WIFI_STA);
  WiFi.begin(WIFI_SSID, WIFI_PASSWORD);

  Serial.print("Dang ket noi WiFi");
  while (WiFi.status() != WL_CONNECTED) {
    delay(500);
    Serial.print(".");
  }
  Serial.printf("\nIP: %s\n", WiFi.localIP().toString().c_str());

  // Cau hinh toi gian: hostname + password, khong can callback chi tiet.
  ArduinoOTA.setHostname("esp32-lan-ota-minimal");
  ArduinoOTA.setPassword("iotlabs-ota-2026");
  ArduinoOTA.begin();

  Serial.println("ArduinoOTA san sang - vao Arduino IDE > Tools > Port de chon port mang.");
}

void loop() {
  ArduinoOTA.handle();
}
6. Example #3 — Configuring PlatformIO to Upload over the Network (espota)
In PlatformIO, switch upload_protocol to espota and point upload_port at the ESP32's IP address on the LAN (printed to Serial during the first USB flash), so the Upload button sends firmware over WiFi instead of USB.
[env:esp32dev]
platform = espressif32
board = esp32dev
framework = arduino
monitor_speed = 115200

; --- Nap qua USB (mac dinh) ---
; upload_protocol = esptool

; --- Nap qua mang LAN bang ArduinoOTA (espota) ---
; Sau khi da nap 1 lan qua USB voi firmware co ArduinoOTA.begin(),
; doi upload_protocol + upload_port sang IP cua ESP32 tren LAN
; roi bam Upload nhu binh thuong - PlatformIO se nap qua WiFi.
upload_protocol = espota
upload_port = 192.168.1.50      ; thay bang IP thuc te cua ESP32
upload_flags =
    --port=3232
    --auth=iotlabs-ota-2026     ; phai khop OTA_PASSWORD trong code
7. Common Issues
Issue | Cause | Fix |
|---|---|---|
The Arduino IDE doesn't show the ESP32 under the Port (Network) menu | The PC and ESP32 aren't on the same WiFi/LAN, or mDNS is blocked by the router/firewall/a client-isolating VLAN | Make sure the PC and ESP32 are on the same router/SSID, and disable client/AP isolation on the router if it has that setting |
OTA reports "Authentication Failed" | The password set in ArduinoOTA.setPassword() in the firmware doesn't match the password entered when flashing (or the --auth value in platformio.ini) | Keep exactly one password in sync between the code and the flashing tool; change the default password from this guide before real use |
The very first OTA flash always fails | ArduinoOTA only works once the ESP32 already has firmware running that includes ArduinoOTA.begin() — you can't OTA-flash a "blank" ESP32 that's never been programmed | Always flash the very first time over a USB cable with firmware that already includes ArduinoOTA — only then can subsequent flashes go over OTA |
The ESP32 seems "stuck" and won't accept OTA even though it's still reachable on the network (pingable) | loop() contains a long blocking section (a long delay, or a loop waiting on a sensor) that keeps ArduinoOTA.handle() from being called in time | Avoid long delay() calls or infinite while loops in loop(); call ArduinoOTA.handle() on every pass, and move slow tasks to a separate FreeRTOS task if needed |
8. Summary
ArduinoOTA lets you flash ESP32 firmware entirely over WiFi on the same LAN, with no USB cable and no server infrastructure — unlike Cloud OTA, which is meant for devices out in the field, not on the same network as the developer.
Three key takeaways:
(1) the very first firmware must be flashed over USB to "seed" ArduinoOTA
(2) always call
ArduinoOTA.handle()regularly in an unblockedloop()(3) always set an OTA password and only use it on a trusted network.
A natural next step: combine this with other ESP32 projects (sensors, actuators) so you can update the control logic remotely without ever removing the device from its installed location.