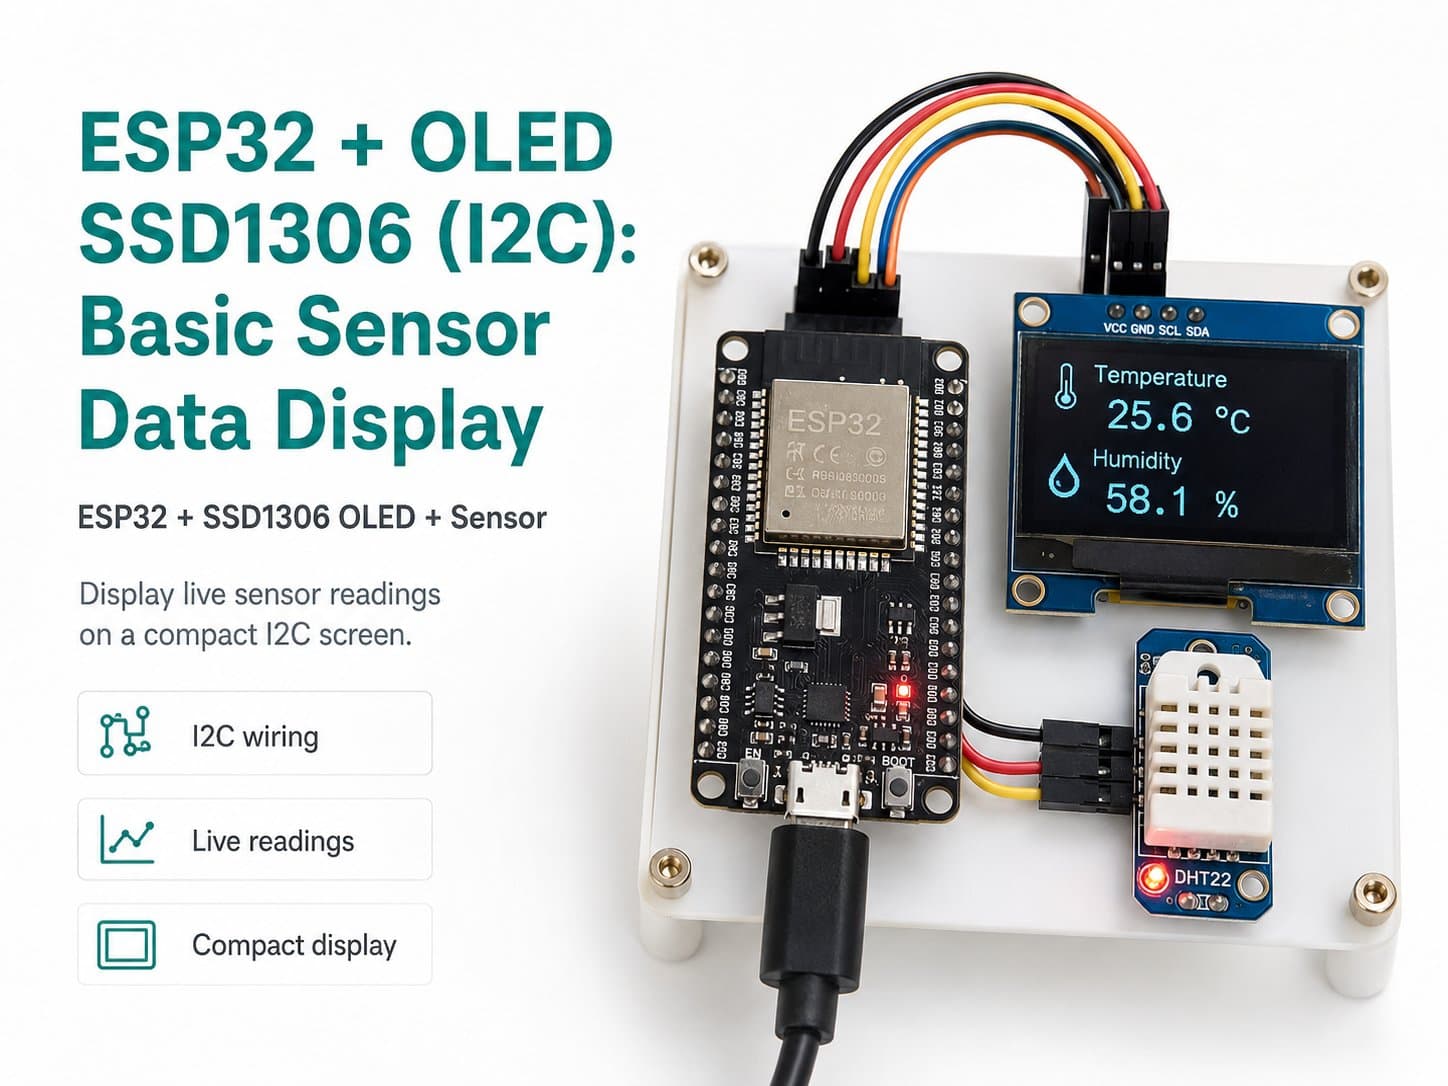
ESP32 + OLED SSD1306 (I2C): Basic Sensor Data Display
Learn to connect a 0.96" I2C SSD1306 OLED display to an ESP32 DevKit and show real-time sensor data (temperature, humidity) using the Adafruit_SSD1306 library.
The 0.96" 128x64 I2C OLED display (SSD1306 driver) is the most popular choice for showing sensor data on ESP32 projects thanks to its low price, low power draw (~20mA), and needing only 2 signal wires (SDA/SCL) besides power.
This article shows how to wire an ESP32 DevKit to an SSD1306 OLED over I2C and write a program that reads sensor data and displays it on-screen using the Adafruit_SSD1306 + Adafruit_GFX libraries.
Detailed guide
Connect an ESP32 DevKit to a 0.96" SSD1306 OLED over I2C, reading sensor data and displaying it in real time with Adafruit_SSD1306. Code compiles cleanly with arduino-cli.
1. Introduction
The 0.96" 128x64 I2C OLED display (SSD1306 driver) is the most popular choice for showing sensor data on ESP32 projects thanks to its low price, low power draw (~20mA), and needing only 2 signal wires (SDA/SCL) besides power. This article shows how to wire an ESP32 DevKit to an SSD1306 OLED over I2C and write a program that reads sensor data and displays it on-screen using the Adafruit_SSD1306 + Adafruit_GFX libraries.
An OLED needs no backlight (every pixel emits its own light), giving it very high contrast — well suited for showing temperature/humidity readings and WiFi/MQTT connection status on compact IoT devices.
2. Components Needed
| Component | Qty | Reference Price |
|---|---|---|
| ESP32 DevKit V4 (30/38 pin) | 1 | ~75,000 - 120,000₫ |
| OLED 0.96" 128x64 I2C (SSD1306) | 1 | ~35,000 - 60,000₫ |
| Female-Female Jumper Wires (4 wires) | 1 set | ~10,000₫ |
3. Wiring Diagram
Just 4 wires: 2 power + 2 I2C signal. The SSD1306 OLED works fine at both 3.3V and 5V, but it's best to power it directly from the ESP32's 3.3V so the I2C bus stays at a consistent 3.3V logic level — completely safe for the ESP32's GPIO (which can't tolerate 5V on input pins).
| OLED SSD1306 | ESP32 DevKit | Note |
|---|---|---|
| VCC | 3V3 | 3.3V supply |
| GND | GND | Common ground |
| SCL | GPIO22 | I2C Clock (ESP32 default) |
| SDA | GPIO21 | I2C Data (ESP32 default) |
Voltage safety: the SSD1306 OLED module used here has an onboard 3.3V-5V driver, but we power it directly with 3V3 to avoid any logic-level risk — no level shifter needed.
4. Full Sample Code
The program initializes I2C on the correct GPIO21/GPIO22 pins, checks whether the OLED responds at address 0x3C (with a clear log message if not found), then every 2 seconds reads sensor data (simulated here — swap in a real sensor for deployment) and redraws it on the display.
#include <Wire.h>
#include <Adafruit_GFX.h>
#include <Adafruit_SSD1306.h>

#define SCREEN_WIDTH 128
#define SCREEN_HEIGHT 64
#define OLED_RESET -1
#define SCREEN_ADDRESS 0x3C

#define I2C_SDA 21
#define I2C_SCL 22

Adafruit_SSD1306 display(SCREEN_WIDTH, SCREEN_HEIGHT, &Wire, OLED_RESET);

unsigned long lastRead = 0;
const unsigned long READ_INTERVAL_MS = 2000;
bool sensorOk = false;

float readTemperatureC() {
  // Khong co cam bien vat ly trong demo nay: gia lap gia tri hop le.
  // Thay bang dht.readTemperature() / bme.readTemperature() khi co cam bien that.
  float simulated = 26.5f + (float)((millis() / 2000) % 5);
  return simulated;
}

float readHumidityPct() {
  float simulated = 55.0f + (float)((millis() / 3000) % 10);
  return simulated;
}

void setup() {
  Serial.begin(115200);
  delay(200);
  Serial.println(F("[BOOT] ESP32 OLED SSD1306 demo starting..."));

  Wire.begin(I2C_SDA, I2C_SCL);

  if (!display.begin(SSD1306_SWITCHCAPVCC, SCREEN_ADDRESS)) {
    Serial.println(F("[ERROR] SSD1306 khong tim thay tren I2C bus (0x3C). Kiem tra day SDA/SCL."));
    sensorOk = false;
  } else {
    sensorOk = true;
    display.clearDisplay();
    display.setTextSize(1);
    display.setTextColor(SSD1306_WHITE);
    display.setCursor(0, 0);
    display.println(F("IoTLabs Maker"));
    display.println(F("OLED SSD1306 Demo"));
    display.display();
    Serial.println(F("[OK] OLED SSD1306 khoi tao thanh cong."));
  }
}

void loop() {
  unsigned long now = millis();
  if (now - lastRead >= READ_INTERVAL_MS) {
    lastRead = now;
    float t = readTemperatureC();
    float h = readHumidityPct();

    Serial.printf("[DATA] temp=%.1fC hum=%.1f%%\n", t, h);

    if (sensorOk) {
      display.clearDisplay();
      display.setTextSize(1);
      display.setCursor(0, 0);
      display.println(F("Cam bien moi truong"));
      display.drawLine(0, 10, 128, 10, SSD1306_WHITE);

      display.setTextSize(2);
      display.setCursor(0, 16);
      display.printf("T:%.1fC", t);

      display.setCursor(0, 40);
      display.printf("H:%.0f%%", h);
      display.display();
    } else {
      Serial.println(F("[WARN] Display khong san sang, chi in Serial."));
    }
  }
}
Compile result: Sketch uses 339368 bytes (25%) of program storage space. Global variables use 23652 bytes (7%) of dynamic memory. FQBN: esp32:esp32:esp32.
5. Detailed Code Walkthrough
Wire.begin(I2C_SDA, I2C_SCL)— the ESP32 lets you freely reassign I2C pins (unlike fixed-pin AVR boards); here it picks the exact GPIO21/GPIO22 pair that's wired up.display.begin(SSD1306_SWITCHCAPVCC, SCREEN_ADDRESS)returnsfalseif there's no ACK response from address 0x3C on the bus — used to catch a wiring/address error right at boot instead of silently crashing later.readTemperatureC()/readHumidityPct()simulate sensor data with a function that varies based onmillis()— for a real deployment, replace these with real sensor-library calls (DHT22, BME280...).The
loop()only redraws the screen everyREAD_INTERVAL_MS(2 seconds) instead of every iteration — avoiding screen flicker and reducing I2C bus load.
6. Real Applications / Extensions
You can extend this project by: (1) replacing the simulated read functions with a real DHT22/BME280 sensor via the DHT sensor library or Adafruit_BMP280; (2) adding a WiFi/MQTT connection-status icon with drawBitmap(); (3) using U8g2 instead of Adafruit_SSD1306 if you need more fonts with Vietnamese diacritics.
7. Common Issues
| Issue | Cause | Fix |
|---|---|---|
| The display stays off, Serial prints "[ERROR] SSD1306 khong tim thay" | Wrong SDA/SCL wiring or a faulty module | Recheck all 4 wires, use an I2C scanner to confirm address 0x3C |
| Compile error "Adafruit_SSD1306.h: No such file" | The library isn't installed | arduino-cli lib install "Adafruit SSD1306" |
| The display shows noise/a white checkerboard | Wrong I2C address (0x3D instead of 0x3C), or a missing display.display() call | Change SCREEN_ADDRESS to 0x3D, or check that display.display() is called after drawing |
8. Summary
With just 4 wires and the Adafruit_SSD1306 library, an ESP32 can display real-time sensor data on a 0.96" I2C OLED — a foundation for most compact IoT display projects: environmental monitoring stations, smart clocks, mini dashboards.